 titanbotics
Our Robot
Build. Test.
Try again.
How do you teach a robot to follow a plan? We’re learning one movement, one test, and one change at a time.
Meet our most
literal teammate.
Our LEGO robot follows the instructions we code. Getting those instructions right takes testing. A turn that looks right in code can look different on the table!
We use Pybricks to write robot code in Python. We’re exploring straight lines, turns, and curved paths.
That’s our mascot in the picture. Photos of our actual competition robot and its attachments are coming here.
UNEARTHED · 2025–26
Our robot in action.
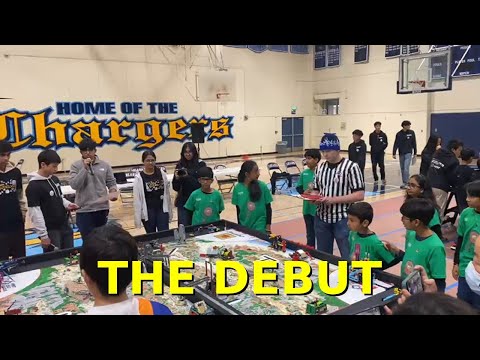
3… 2… 1… GO! Watch our team and robot at the competition table.
Robot notebook · BIOGLOW 2026–27
This week: attachments!
We’re learning new things every week—one step at a time. This week, we explored how to control our robot’s right arm.
Find a start.
Move. Pause. Return.
- Find the starting point. Run the arm until it stalls, with the motor duty limited to 25%. For this setup, the idea is to find the arm’s mechanical stop.
- Call that position zero. Reset the angle reading to 0°. This labels the position; it doesn’t move the arm.
- Try different positions. Tell the arm to go to 180°, then 90°, then 120°, pausing for two seconds at each.
- Come back to zero. Return to the starting angle and hold it.
Our angle plan: 0° → 180° → 90° → 120° → 0°
Each target is measured from zero. Going to 90° after 180° means moving back toward zero, not adding another 90°.
Peek at our Python code
Our lesson snippet. It uses Motor, Port, Stop, and wait from our robot program.
right_arm = Motor(Port.F, gears=[[28, 36], [12, 20]])

right_arm.run_until_stalled(-300, then=Stop.HOLD, duty_limit=25)
right_arm.reset_angle(0)
right_arm.run_target(100, 180, then=Stop.HOLD)
wait(2000)
right_arm.run_target(100, 90, then=Stop.HOLD)
wait(2000)
right_arm.run_target(100, 120, then=Stop.HOLD)
wait(2000)
right_arm.run_target(100, 0, then=Stop.HOLD)
Port F connects the motor. The gear lists describe our two gear stages, so Pybricks accounts for the gearing. Stop.HOLD keeps the arm at its target.
Explore the Pybricks motor commands ↗Next question: Does the arm return to the same position each time? That’s something to measure as we keep testing.
From our robot notebook
Will it come back to the same spot?
We’ve been exploring a curved path: drive out, then reverse along the same curve. The question is simple. Does the robot end up where it started?
- Make a prediction. Mark the starting point and guess where the robot will finish.
- Try it. Run the movement and compare the finishing position with the mark.
- Try one change. Change the speed, repeat the test, and see if the result is different.
A question we’re working on—not a finished result. Our measurements and discoveries belong here next.
How we figure things out.
Build it
What does the robot need to do? Start with that question, then build a LEGO mechanism to try an idea.
Code it
Break the plan into small steps: move, turn, stop. Test each part before putting them together.
Test it. Improve it.
Does it work more than once? Compare where the robot stops with where we expected it to stop. Change one thing and try again.